This page will help you get your rack placement and spacings right for multiple bikes and multiple racks. You can install Steadyracks to suit each bike, optimize your storage space and apply the best heights for easy loading and unloading.
Remember, our Installation Guide covers ideal mounting heights to make installation easy.
Wall Placement Guide
Based on maximum 600mm wide handlebars, leaving 300mm at each end.
Based on maximum 600mm wide handlebars, leaving 300mm at each end.
Based on 800mm wide handlebars, leaving 400mm at each end.
Based on the first rack being right up against the corner, and 1200mm from the last rack to the wall.

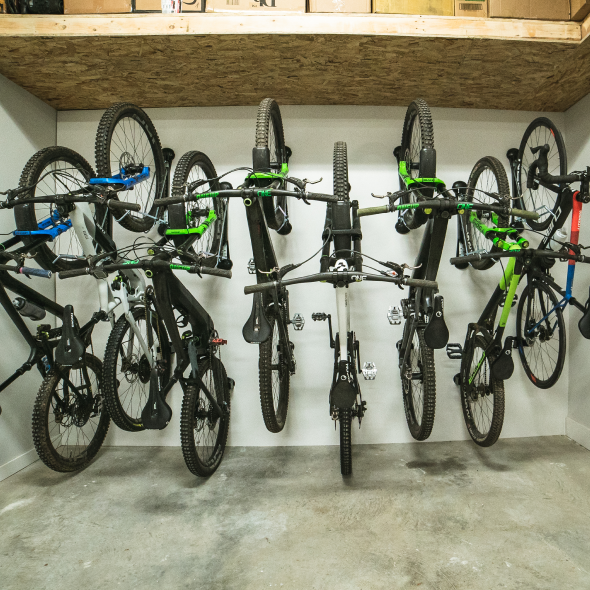
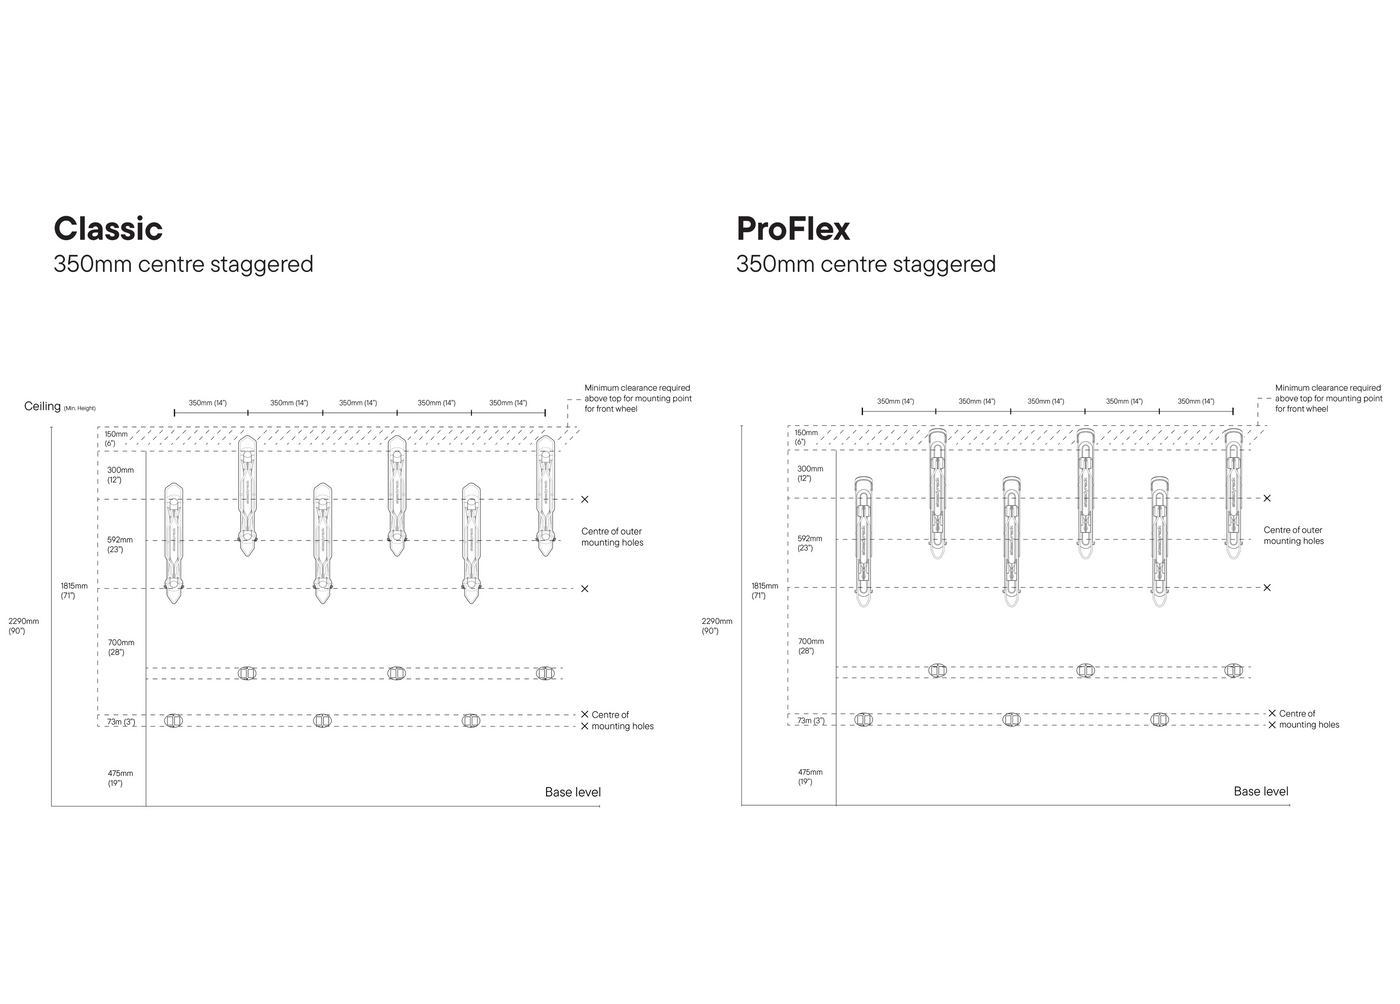
Fit More Bikes into Smaller Spaces
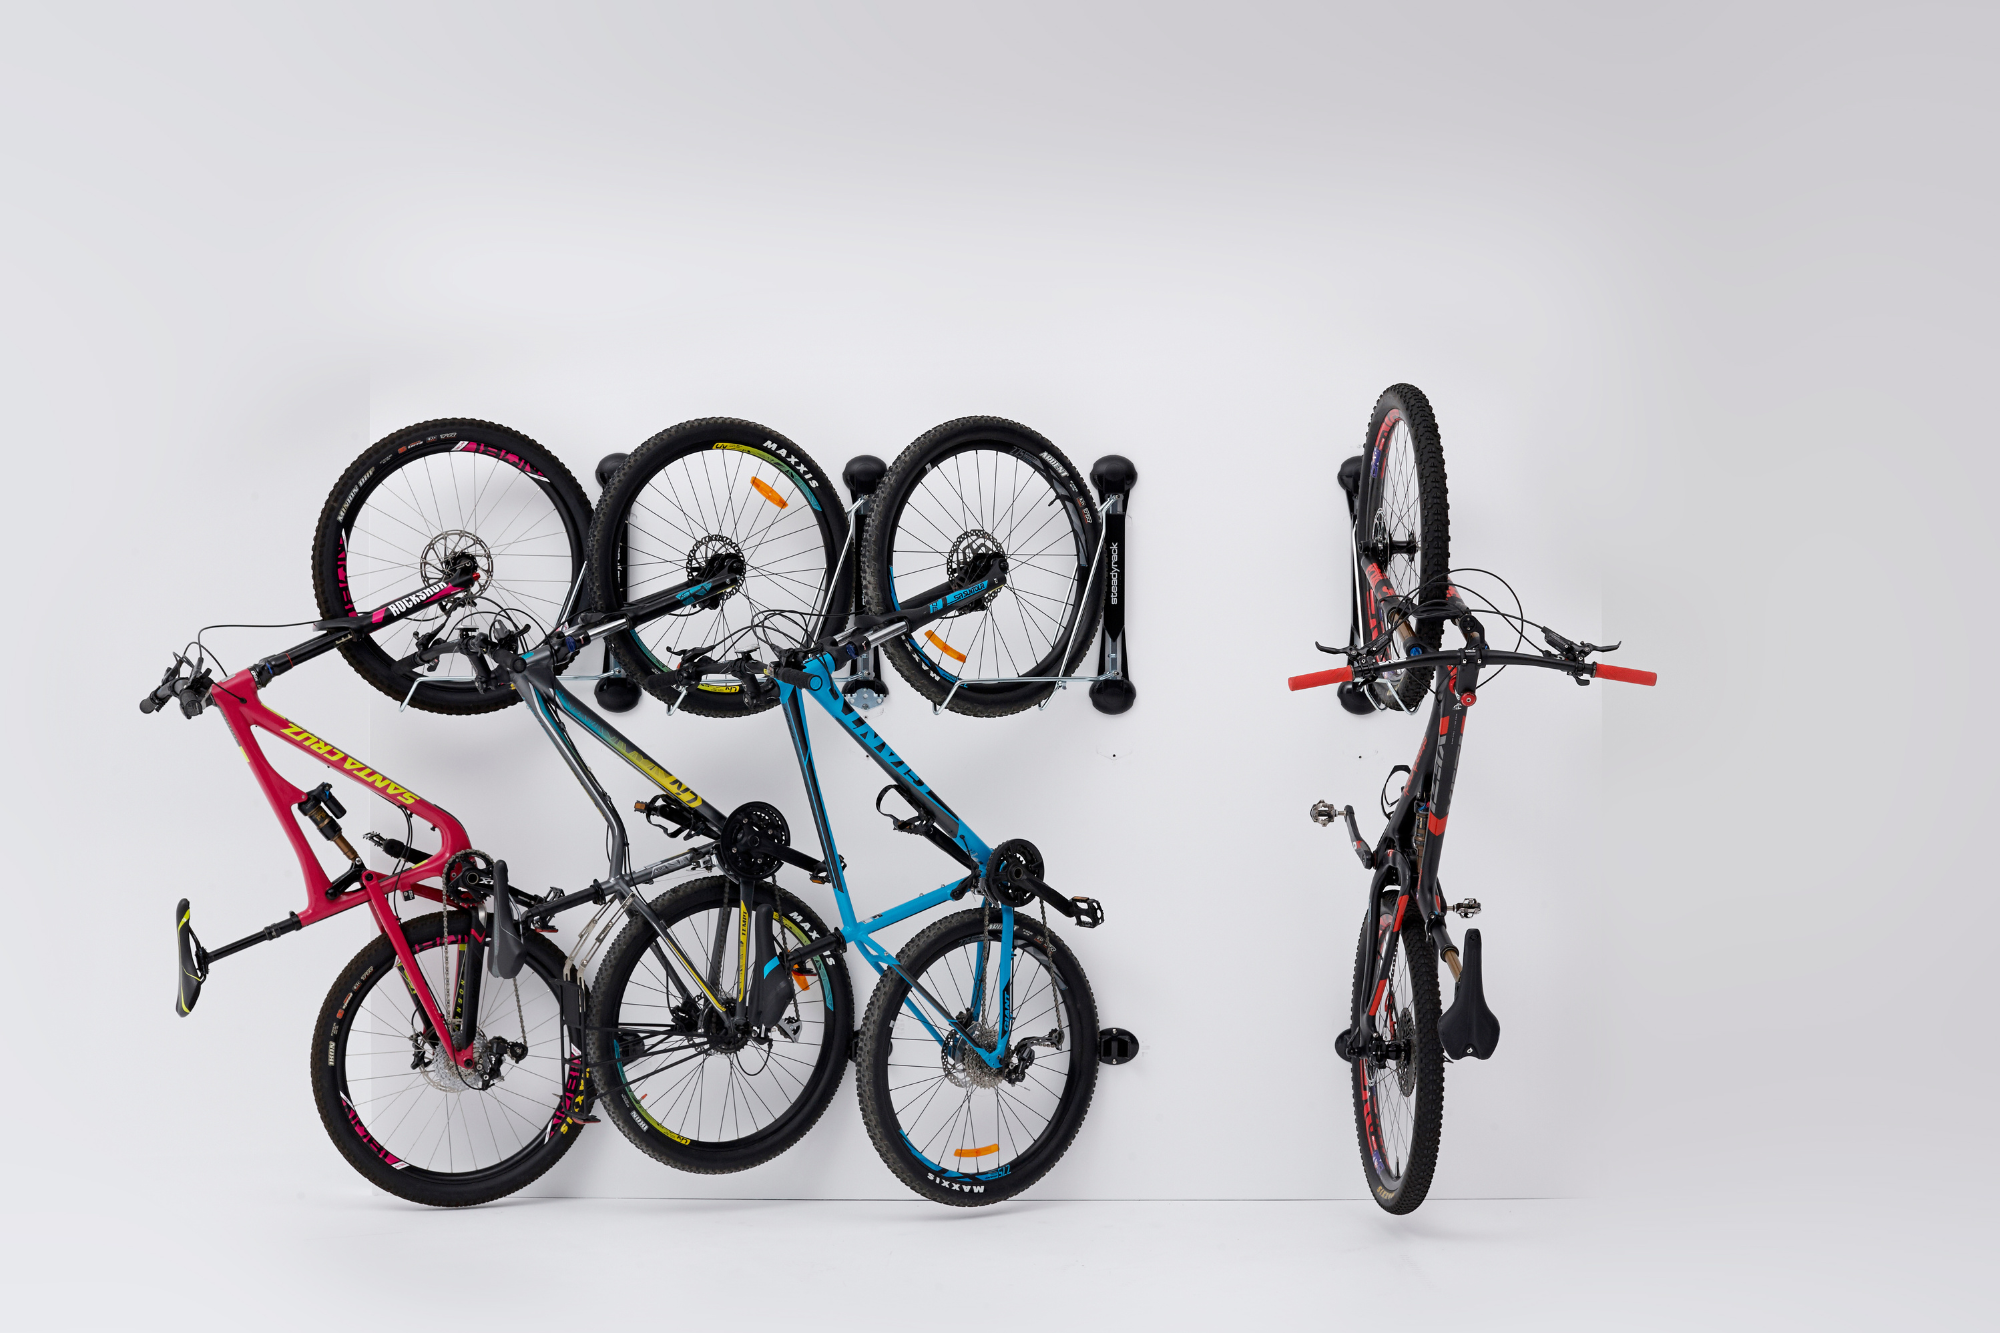
For limited wall space, this setup will allow you to store more bikes in a smaller area.
You can stagger the racks to overlap your bikes, making this option perfect for apartments and small sheds.
Steadyracks can be placed as close as 350mm (1ft 2in) apart.
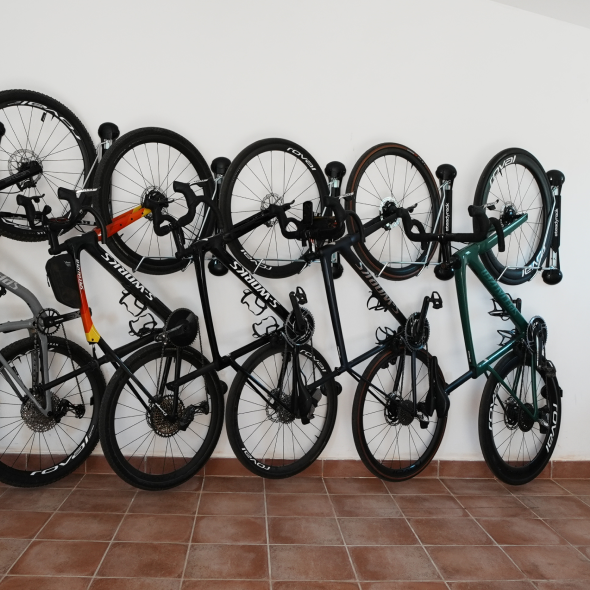
Staggered Height Installation
Fit More Bikes into Smaller Spaces
For limited wall space, this setup will allow you to store more bikes in a smaller area.
You can stagger the racks to overlap your bikes, making this option perfect for apartments and small sheds.
Steadyracks can be placed as close as 350mm (1ft 2in) apart.
Staggered Height Installation

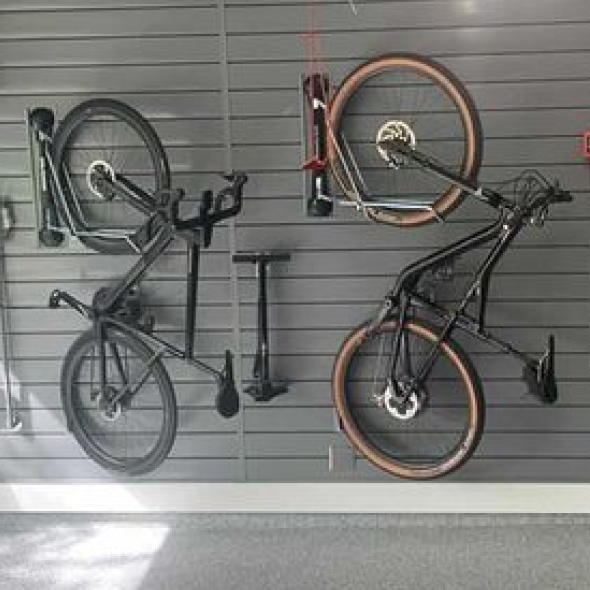
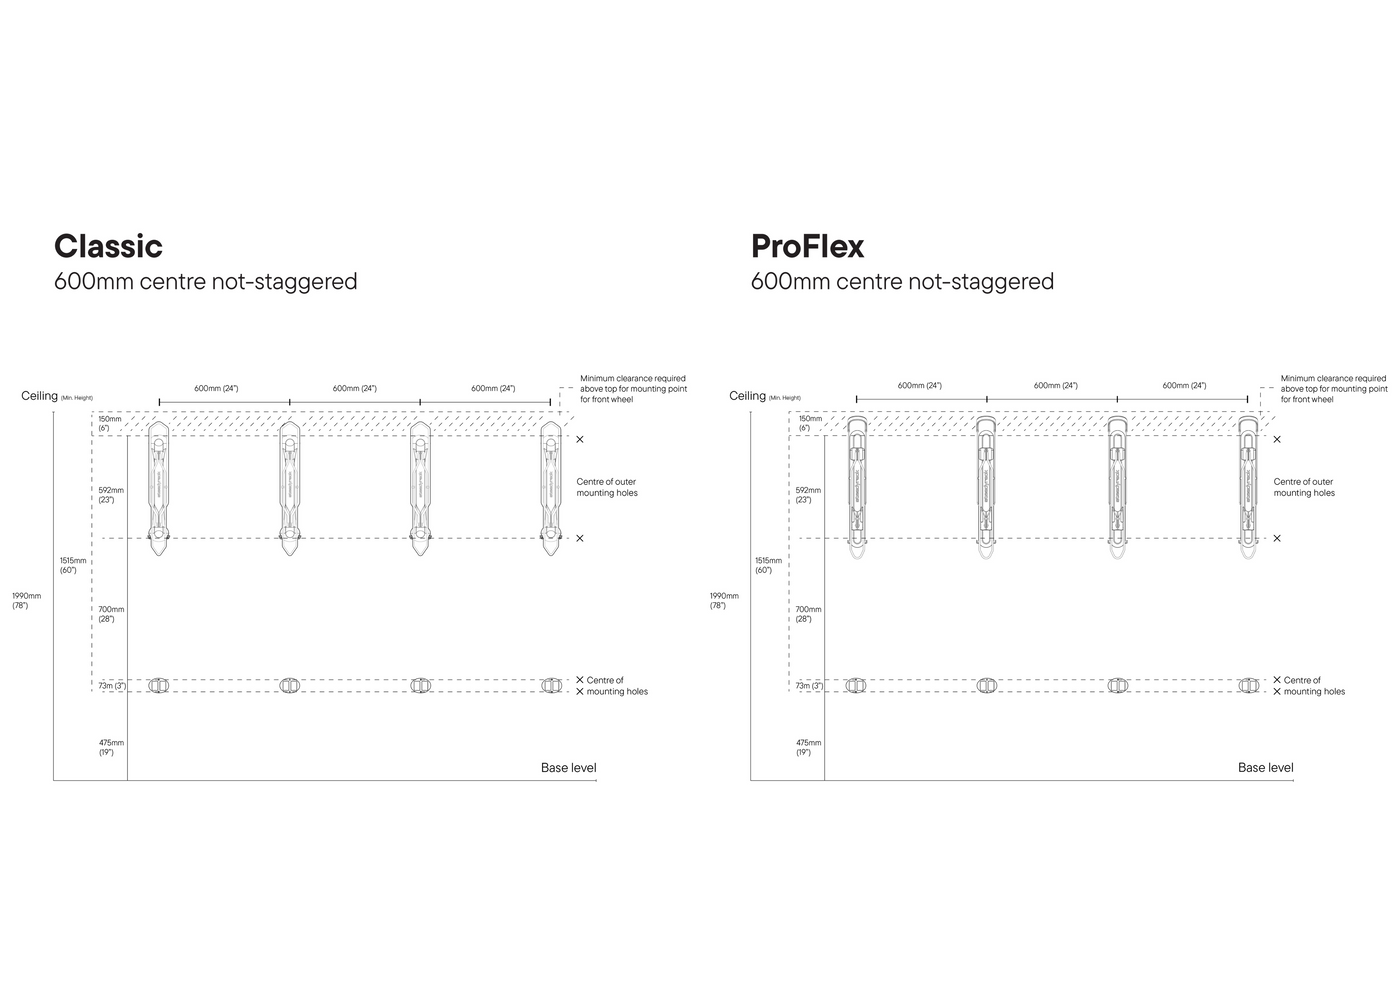
Space Your Racks for Maximum Floor Space
Optimise your floor space by pivoting your bikes as close to the wall as possible.
With more wall space you can space the racks out to store your bikes closer to the wall, and take up less floor space.
This option is great for larger spaces, like garages, and gives more freedom to move cars and other equipment without moving your bikes.
To achieve no bike overlap the racks may need to be 1200mm (~4ft) apart, or more.
When mounting racks at the same height, we recommend a minimum of 600mm (2ft) between racks to allow for the optimum pivot range.
Same Height Installation